Teaching yearbook design to staffs who have never built a spread can feel overwhelming, especially if design isn’t your background. Where should the staff start? What goes on the page first? How do they know when a layout is working? A clear, repeatable process gives your staff a starting point and gives you something concrete to teach, review and coach.
The Design Fundamentals: Building a Traditional Spread Training Series gives you four lessons you can bring straight into your classroom. Yearbook experts Sabrina Cady, CJE and Jim Jordan walk you and your staff through setting up their pages, identifying the essential parts of a spread, applying foundational design principles and bringing everything together in a finished layout. You don’t need advanced design skills to use it. The experts teach the skills, and you can focus on guiding your staff as they practice.
Here is what each lesson covers and why it works so well as classroom curriculum.
Bleeds, Margins and Grids
Every strong spread starts with a solid foundation. The first lesson gives staff the vocabulary and setup habits they need before they place a single photo.
Bleed bars show where trimming may occur during production, so staff learn to keep text and important information safely away from these areas. When photos, backgrounds or graphics are meant to run off the page, they extend them completely through the bleed area. The same care applies to the gutter. Photos can cross it, but faces and important action should stay away from the center seam. Catching these details early means fewer surprises when pages are due.
Next, designers establish external margins to create a consistent frame of white space around the spread.
Once they format their margins, they use grids to guide the placement of photos, text and graphics. In the training, Cady compares the grid to a city map. Larger grid areas act like city blocks where content lives, while internal margins become roadways that remain open. It’s an easy analogy to reuse the next time a staff member asks why something doesn’t line up. Consistent spacing and alignment help readers navigate the spread.
The Essential Parts of a Yearbook Spread
Before staffs start designing, they need to know what they’re designing with.
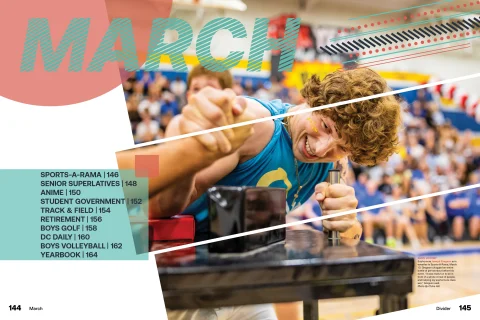
A traditional spread may include a dominant photo, secondary photos, captions, headline and subhead, body copy and mods.
The dominant photo creates a primary visual entry point, while secondary photos continue the visual story. Captions provide information and context. The headline and subhead introduce the coverage, and the body copy provides room for a traditional story.
Mods expand the coverage through additional packages of information. Polls, quotes, statistics, lists and infographics can give readers even more ways to explore the topic.
Knowing what they have to work with helps the staff make intentional placement decisions from the beginning. It also gives you a shared vocabulary for feedback, so you can point to a specific element instead of saying a page “feels off.”
Design Principles for Better Layouts
With their content ready, designers use foundational design principles to organize the spread. These are concepts you can reinforce on every page your staff creates.
The staff should start by designing from the inside out, placing heavier visual elements near the center and working toward the outer edges. This approach helps create balance across both pages.
Next, they establish hierarchy. Size, placement and contrast tell readers which element to notice first and where to go next.
They use white space to organize content. Small, consistent spaces can group related elements, while wider areas can separate different packages of information.
Finally, they pay attention to alignment. Grids help create clean edges, consistent spacing and eyelines that visually connect the spread. Because each principle shows up as a visible choice on the page, staff can check their own work and you can give specific, constructive feedback.
Building Your Spread Step by Step
The final lesson brings everything together in a process staffs can follow from start to finish.
Cady and Jordan demonstrate an eight-step process designers can use to build a traditional spread:
- Place the dominant photo
- Establish an eyeline
- Add secondary photos
- Place captions
- Add the headline and subhead
- Place body copy
- Add mods
- Review the finished spread using your design principles
Following a consistent process gives new designers a starting point and reinforces the design principles they can carry into future layouts. For you, it means a repeatable routine you can use for every spread, whether you’re coaching a returning designer or a first-year staffer.
Why This Series Works in Your Classroom
- It follows a clear progression. Designers will move from setup to essential parts to design principles to a finished spread, so each lesson builds on the last.
- It is taught by yearbook experts. You don’t have to be the design expert in the room. We model the skills, and you can coach your staff through them.
- It shows the work, not just the theory. Staff watch a traditional spread come together, then see how each design principle shapes the finished page.
- It gives you a repeatable process. The eight-step method works for every spread, which means less reteaching and more time for feedback.
- It builds shared language. Terms like bleed, grid, hierarchy and alignment help you and your staff talk about design with confidence.
Design becomes easier with practice. Understanding bleeds, margins, grids, hierarchy, white space and alignment gives staffs a foundation they can use throughout the year and gives you the confidence to guide them.
Watch Design Fundamentals: Building a Traditional Spread with your staff and follow along as Cady, CJE and Jordan build a traditional yearbook spread from setup to completion.
Explore How Walsworth Makes Yearbooks Easier
This series is just one example of how Walsworth supports advisers and their staffs. Our educational opportunities include training videos, curriculum and resources designed to take the guesswork out of yearbook production, whether you’re new to the classroom or looking for fresh ideas. Explore what Walsworth has to offer and see how much easier yearbooks can be with a partner who is invested in your success. Connect with a Walsworth representative to get started.